Record your Laptop screen with these free apps (No Watermark)
These free screen recorders will get the job done. You might not even need to edit.

When coding on Windows 10 or 10 Pro, capturing your screen is essential for sharing and archiving your work, demonstrating issues, onboarding or creating tutorials.
To do so a screen recording tool can streamline communication and help you convey your points visually especially within remote teams. The best part is that these visual references can always be revisited.
But finding the right tool without a watermark can be time-consuming, so we've done the heavy lifting.
In this guide, we've curated the best free screen recording apps you can use to capture your codes effortlessly on your Windows PC. Some of these include features like audio addition, facecam overlay and webcam feed.
Let's explore the top options one by one!
10 free Screen recorders for your Windows PC
Before we get to the list, think about your needs and what the recorded video should look like.
Should it include a full-screen recording, capture a webcam footage, or even an internal audio? Would you need to edit afterwards? Also, consider your preferred video format, and whether you need to upload directly to YouTube or save in the cloud.
With these factors in mind, you'll be ready to pick the right tool.
#1. Game Bar (Windows + G)
Best for: Free Capture and Gaming | Time Limit: 30 minutes, No watermark | Full Window Capture: No | Record multiple monitors at once: No | Game Capture: Yes | Webcam Capture: No | Image Capture: Yes | Mix System Sound/Mic: Yes | Scheduled Recording: No | Audio Recording: No | Annotation: No | Video (encoder): MP4 | Hotkeys: Yes | One-click uploads: No
Developers who use Windows 10 have a handy built-in option called Xbox Game Bar for recording their screens. Initially designed for capturing games, but you can use it to handle a variety of recording needs, on your computer. With a straightforward interface, starting a recording is as simple as pressing “Win + G.”
Though it’s user-friendly and provides basic functionality, Game Bar is somewhat limited. It can record a single application at a time and doesn’t offer advanced scheduling features. However, for straightforward tasks like capturing demos or browsing, it works well. Keep in mind that Game Bar requires Windows 10 version 17763.0 or higher.
Overall, it offers a convenient, no-cost solution for screen recording on Windows 10, fitting seamlessly into your workflows.
Pros:
- Available for free for Windows users.
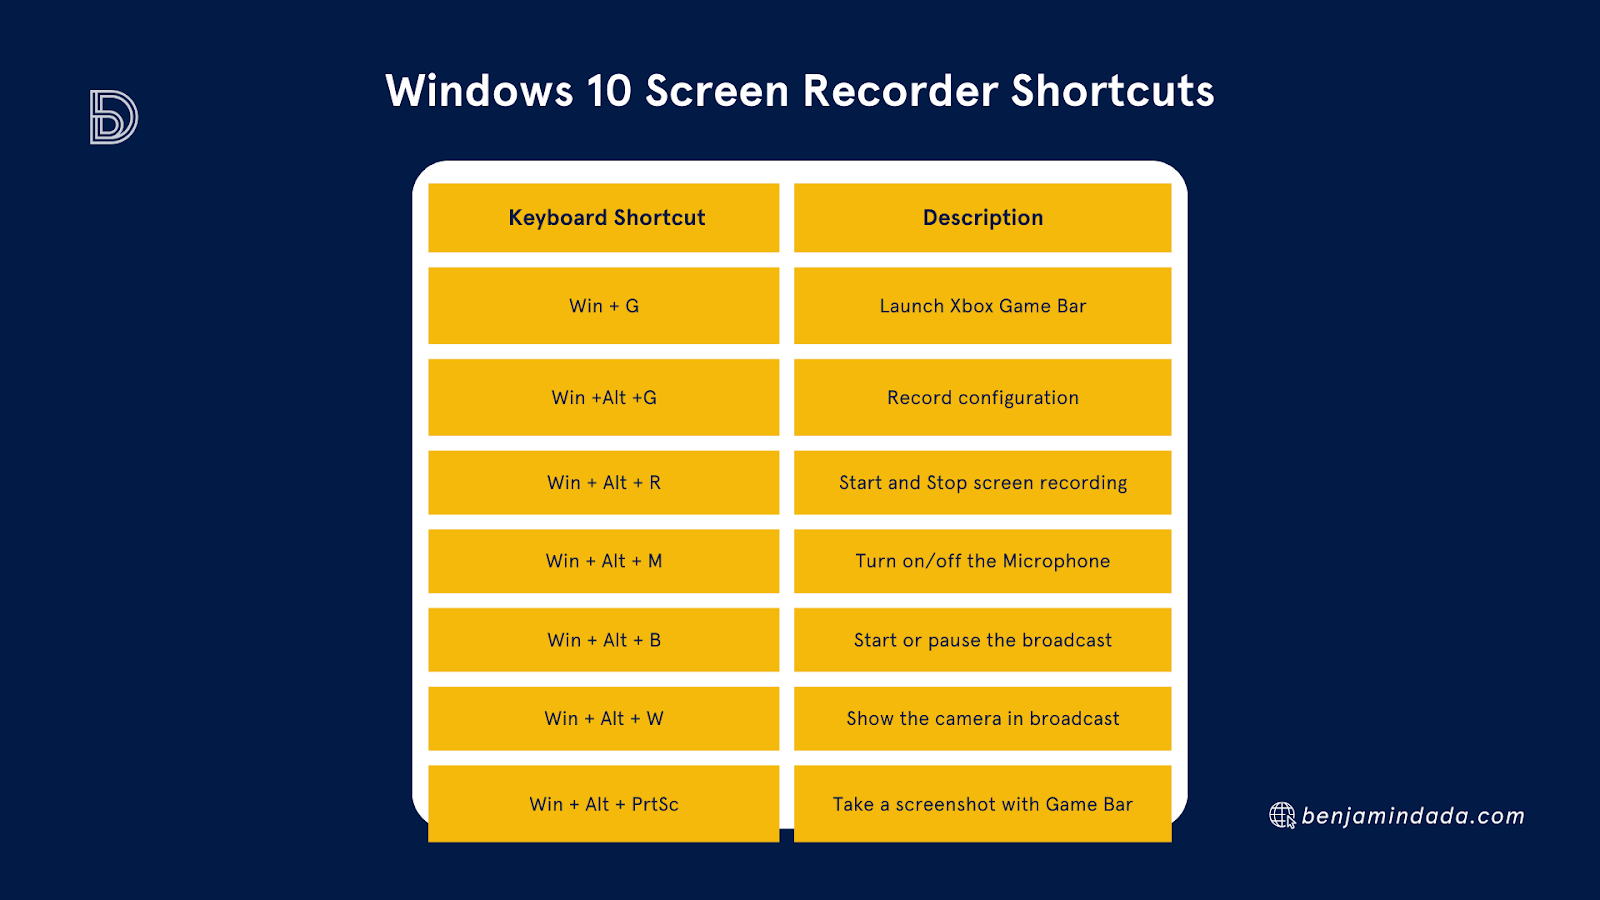
- Lots of hotkeys for managing the recording process.
- Built-in social integration.
- User-friendly.
Cons:
- Doesn’t work on older versions of Windows.
- Recorded files can be large.
- Limited to Full-Screen Apps.
How to record your screen with Windows Game Bar
- Open Windows Settings by pressing the Windows logo key + I.
- Enable Game Mode under "Gaming" settings.
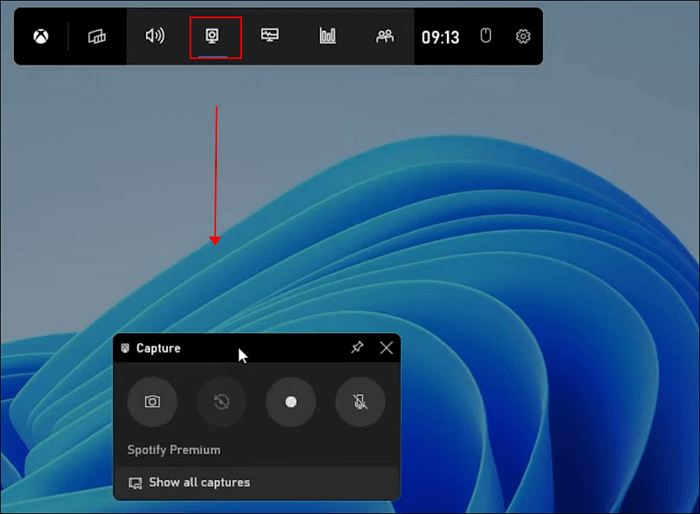
- Launch the Xbox Game Bar by pressing Windows + G.
- Open the app or window you want to record.
- Start recording by selecting the "Capture" button or pressing Windows + ALT + R.
- Optionally, capture microphone audio during recording.
Stop recording by clicking the stop button in the Game Bar widget.
#2. OBS Studio
Best for: Streaming and Multi-Monitor Support | Time Limit: None, No watermark | Full Window Capture: Yes | Game Capture: Yes | Webcam Capture: Yes | Image Capture: Yes | Mix System Sound/Mic: Yes | Scheduled Recording: No | Record multiple monitors at once: Yes | Audio Recording: Yes | Annotation: No | Video (encoder): MKV, MP4, FLV, MOV, TS, M2U8, and all FFmpeg available container formats (software X.264, hardware QSV) | Hotkeys: Yes | One-click uploads: No
OBS Studio is a top choice for recording your coding tutorials on Windows 10. This free, open-source software excels at capturing on-screen activities, from full displays to specific windows and applications.
OBS is a favourite among many for its versatility. It supports real-time video recording and audio capturing, letting you adjust layouts and track sources as needed.
Although it offers robust features, including customisable overlays and direct broadcasting to platforms like YouTube, beginners might find the sheer number of options in its interface overwhelming.
But once you conquer the initial setup, OBS Studio gives you unlimited possibilities for your teaching adventures.
Pros:
- Can place video sources on different layers.
- Completely free and open source.
- No restrictions on video length.
- Stream to Twitch, YouTube, Facebook, etc.
- Support to customise with plugins.
Cons:
- May be too complex for beginners.
- It takes time to figure it out.
How to record your screen with OBS:
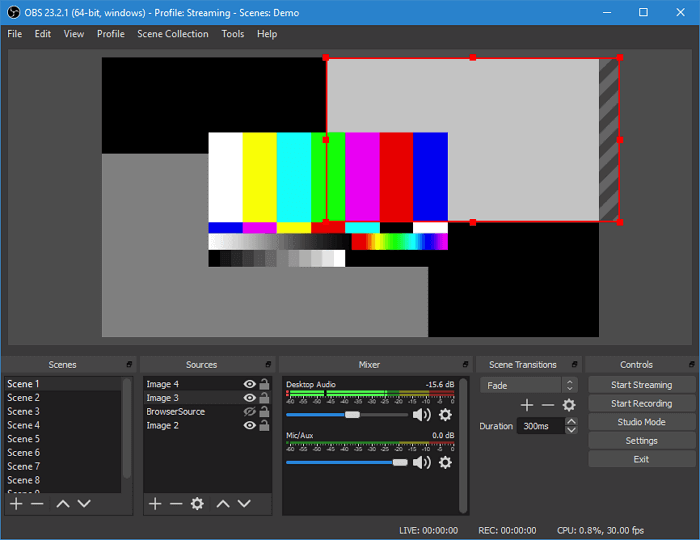
- Download and install OBS Studio, then launch it to begin screen recording.
- Configure your video capture settings in the Sources box, including title and audio options.
- Set the save destination, then start and stop recording as needed.
#3. CamStudio
Best for: Video tutorials and Bug tracking | Time Limit: None, No watermark | Full Window Capture: Yes | Game Capture: No | Webcam Capture: Yes | Image Capture: Yes | Mix System Sound/Mic: Yes | Scheduled Recording: No | Record multiple monitors at once: Yes | Audio Recording: Yes | Annotation: Yes | Video (encoder): AVI, SWF (CamStudio’s native formats) | Hotkeys: Yes | One-click uploads: No
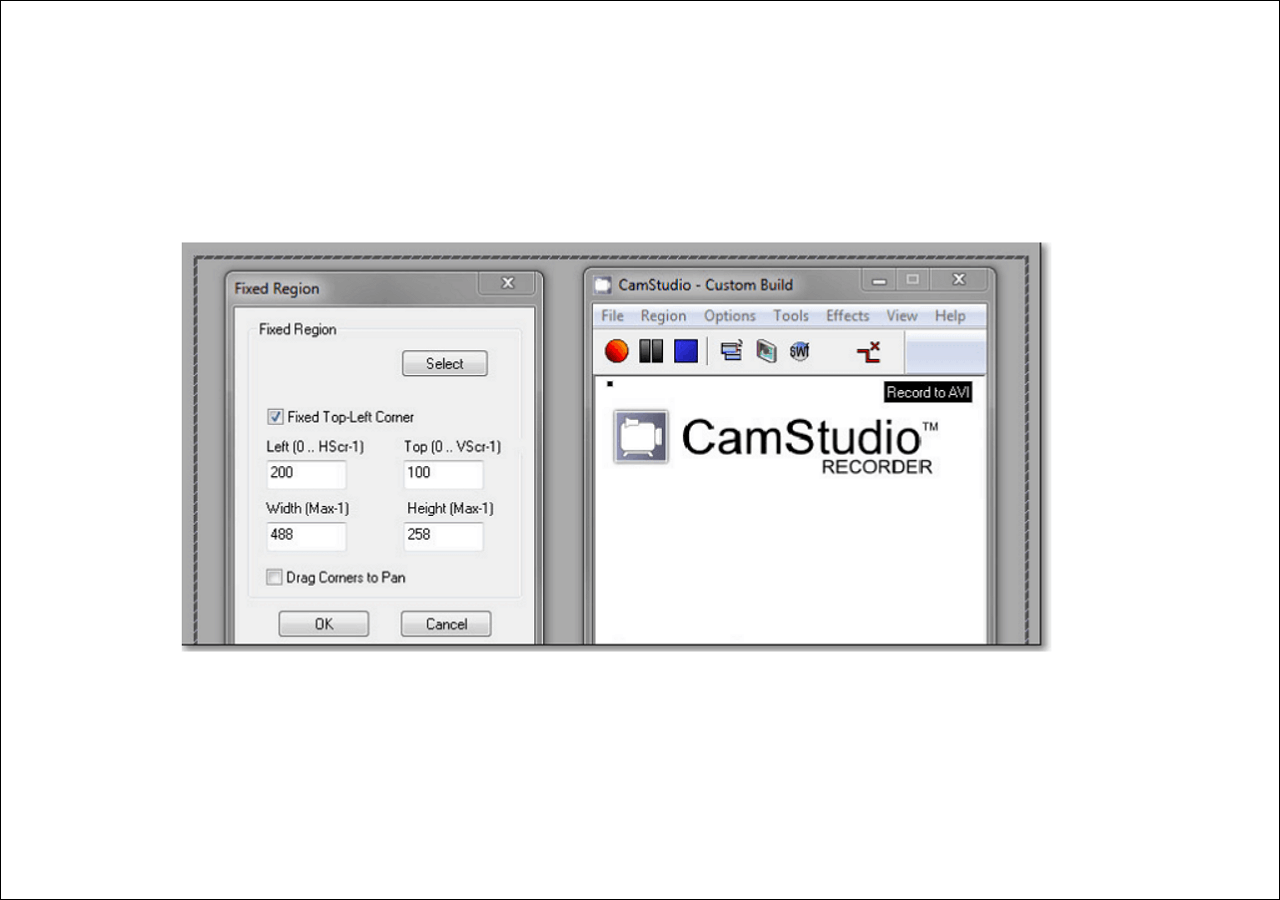
CamStudio is a notable tool for coders seeking a straightforward way to capture their screen activity on Windows 10. This open-source software is tailored for recording both video and audio and offers the flexibility to convert files into bandwidth-efficient Flash videos if needed.
One of CamStudio's standout features is its Lossless Codec. You can expect high-quality recordings without excessive file sizes. CamStudio's video annotation feature lets you add clear, anti-aliased captions, enhancing your recordings.
While the default output format is AVI, you can opt for SWF for streaming needs. The application also includes options to adjust video quality, compress files, and even manage mouse cursor visibility during recording.
Pros:
- Offers recording options for region, fixed region, window, and full screen.
- Multiple sound recording options (No audio logging, Capturing from a microphone or speaker.)
- Includes a built-in help file for user assistance.
- Open source screen recorder to record screen without time limitation.
Cons:
- No advanced features are found in other screen recording software.
- The interface may not be very polished.
How to record your screen with CamStudio:
- Open CamStudio from your desktop or start menu.
- Configure video and audio settings via the Options menu.
- Select the recording area under the Region menu.
- Start recording by clicking the red Record button or pressing F8.
- Pause with the Pause button or F9, and stop with the Stop button or F10.
- Save your recording as an AVI file.
- (Optional) Convert or edit the recording if needed.
#4. TinyTake
Best for: Basic screen recording | Time Limit: 60 minutes per video (free version), No watermark | Full Window Capture: Yes | Game Capture: No | Webcam Capture: Yes | Image Capture: Yes | Mix System Sound/Mic: Yes | Scheduled Recording: No | Record multiple monitors at once: No | Audio Recording: Yes | Annotation: Yes (basic tools like text, arrows, and shapes) | Video (encoder): Wmv. (but can be converted to MP4) | Hotkeys: Yes | One-click uploads: Yes (YouTube, links.)
TinyTake allows for both video and image capture with a straightforward interface that makes recording and sharing easy between teams. This free app supports capturing your entire coding screen or specific areas, including multi-monitor setups.
You can enhance your recordings with annotations, captions, and shapes, and even create GIFs or movies from your captures. TinyTake also handles video lengths from a single second to several hours, with options to include mouse movements and voice narration.
It lets you save your recordings to the Cloud or share them online. TinyTake’s technical support is available through email and an online help centre.
Pros:
- Can capture Webcam and on-screen activity with a single tap of a key.
- Can blur sensitive information.
- Has a clean UI.
- Create GIFs out of images and videos in a matter of time.
- Excellent file management.
Cons:
- Limited recording time.
- Might be slow while loading large videos.
- Unpopular encoder format.
- Expensive plans.
How to record your screen with TinyTake:
- Open TinyTake from your desktop or start menu.
- Adjust settings for devices, volume, microphone, and video quality via the TinyTake icon in the system tray.
- Select Capture Video from the TinyTake icon, choose your recording area, and click Start Recording.
- Minimise TinyTake and carry out the actions you want to record.
- Stop recording by pressing Ctrl + D or selecting Stop Recording from the TinyTake icon.
- Save the video locally or upload it to the cloud, with options to annotate before saving or sharing.
#5. ScreenRec
Best for: Quick Bug reporting with Instant sharing Time Limit: None (after creating a free account), No watermark | Full Window Capture: Yes | Game Capture: Yes | Webcam Capture: Yes | Image Capture: Yes | Mix System Sound/Mic: Yes | Scheduled Recording: No | Record multiple monitors at once: Yes | Audio Recording: Yes | Annotation: No | Video (encoder): MP4 (default), supports other formats via FFmpeg | Hotkeys: Yes | One-click uploads: Yes (not socials.)
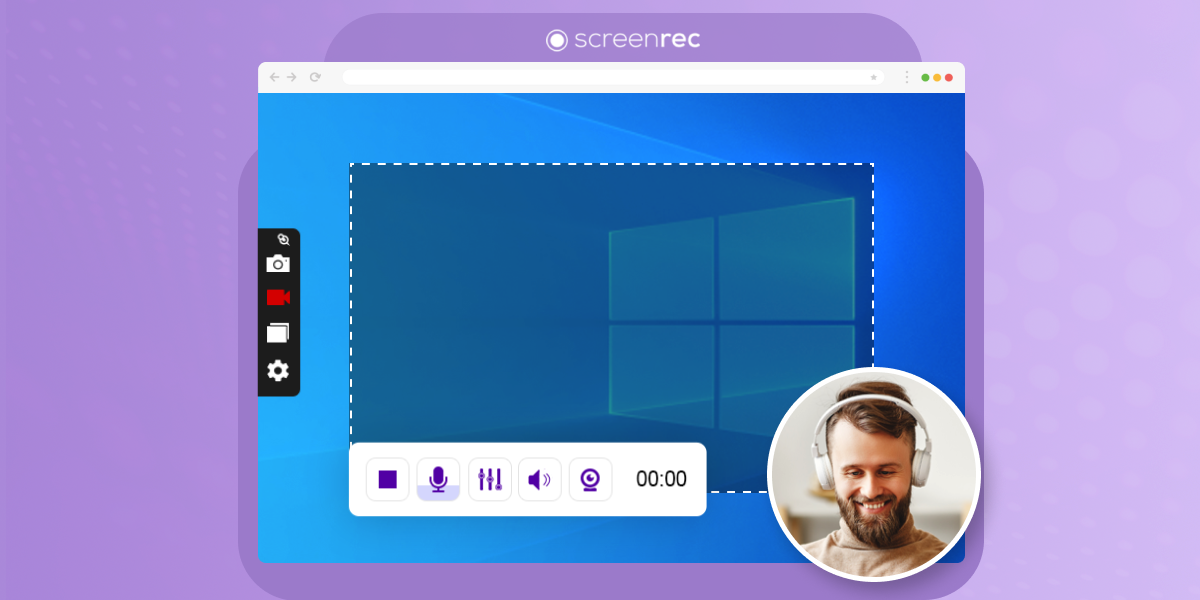
ScreenRec makes it to our picks for the best screen recording tool for coders in 2024. Compatible with the latest Windows 10, this software combines screenshot capture and screen recording with impressive ease.
Thanks to its integration with StreamingVideoProvider, ScreenRec instantly uploads recordings to the cloud and provides you with a secure shareable link the moment you finish. This feature streamlines feedback and issue reporting between developer teams.
The annotation tools are simple yet effective, and you can also record audio from your microphone, system, or both, depending on your needs.
ScreenRec is built with SSL encryption to ensure your recordings are secure.
Pros:
- Instant private link sharing.
- The source code is available for forking or downloading on GitHub.
- Can record HD video with a Webcam.
- Offers 2 GB of free cloud storage.
- Records in high quality with minimal performance impact.
Cons:
- Using the online installer may take time to download all necessary packages.
- Unintuitive Annotation tools.
- You need the internet to install, use, and share screen recordings.
- 5-minute recording limit until you create a free account.
How to record your screen with ScreenRec:
- Install ScreenRec from the official website.
- Launch the application.
- Press Alt + S and drag to select the recording area.
- Click the Video Camera button to start recording.
- Enable audio if needed.
- Click the Stop button to save or share your video.
#6. Loom
Best for: Beginners and Documentation | Time Limit: None, No watermark | Full Window Capture: Yes | Game Capture: No | Webcam Capture: Yes | Image Capture: Yes | Mix System Sound/Mic: Yes | Scheduled Recording: No | Record multiple monitors at once: No | Audio Recording: Yes | Annotation: Yes | Video (encoder): HLS with TS containers for desktop apps, and DASH with WebM containers for the Chrome extension | Hotkeys: Yes | One-click uploads: Yes (Slack, MS Teams, LinkedIn)
Acquired by Atlassian in late 2023, Loom is one of the best screen recorders for Windows users in 2024. Software developers can add it to the Chrome extension and then use it to record full screen on Windows 10 with ease.
Loom is a top and versatile choice for Windows 10 users looking to record their screens and easily enhance asynchronous communication.
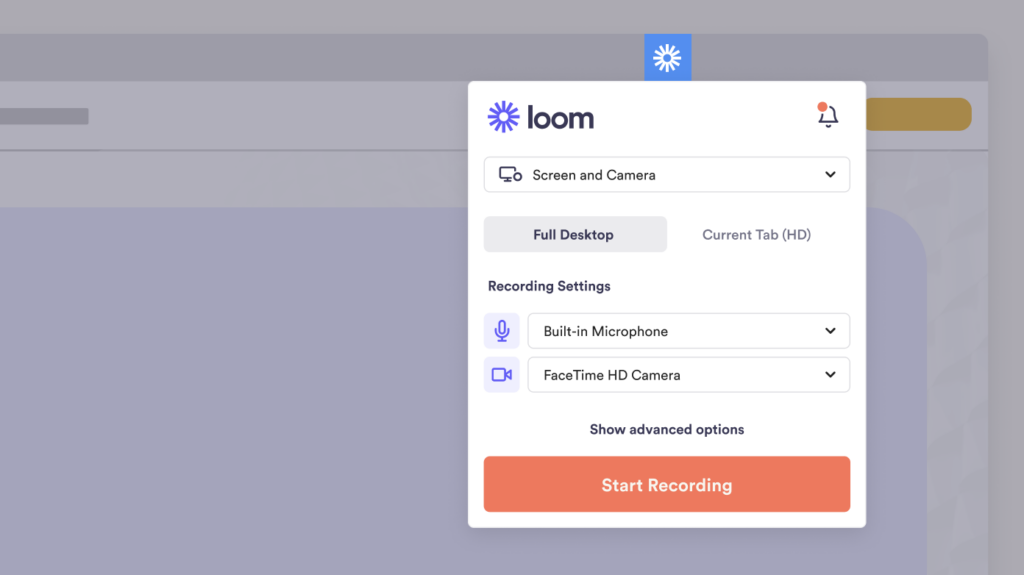
As a Chrome extension, Loom simplifies the recording process, allowing you to capture full-screen actions without the need for additional downloads. Videos are automatically copied to your clipboard, which you can then share through links.
For developers with a reliable internet connection, this tool provides a convenient and quick recording solution. It stands out for features like time-coded comments, emoji reactions, options for screen and webcam recording, video editing, and AI-powered video messages.
Loom's free Starter plan offers up to 25 five-minute videos per user, while the Business plan at $8 per user per month unlocks unlimited video recording.
Pros:
- Multiple recording modes
- Time-coded comments and emoji reactions
- Embed with HTML code
- Support Chrome extension
Cons:
- Video files can only be saved as MP4
- No video editing functions
How to record your screen with Loom:
- Download Loom and choose between Cam Only, Screen Only, or Screen + Cam for your recording type.
- Select recording settings: Full Screen, Window, or Custom Size (Pro feature).
- Use your device's built-in or external webcam and microphone for recording.
- Or Install the Loom Chrome Extension from the Chrome Web Store and activate it via the pinwheel logo.
- In the Chrome Extension, choose between whole screen or single tab recording.
- Use Loom's Video Control menu to start, pause, or delete recordings in both desktop and Chrome versions.
- Access the Drawing tool with a Pro subscription to highlight key details in your video.
#7. Awesome Screen Recorder

Best for: Performance capture and Collaboration | Time Limit: None, No watermark | Full Window Capture: Yes | Game Capture: Yes | Webcam Capture: Yes | Image Capture: Yes | Mix System Sound/Mic: Yes | Scheduled Recording: No | Record multiple monitors at once: Yes | Audio Recording: Yes | Annotation: Yes | Video (encoder): MKV, MP4, FLV, MOV, TS, M2U8, and all FFmpeg available container formats (software X.264, hardware QSV) | Hotkeys: Yes | One-click uploads: Yes
Awesome Screen Recorder & Screenshot is a perfect screen recording tool for coders who need a reliable way to capture their work. With support for major browsers like Chrome, Edge, Safari, and Firefox, it caters to a broad user base.
The tool allows you to record your entire coding screen or just specific areas, including desktop and webcam feeds. Every detail in resolutions up to 4K!
Its screenshot capabilities are equally robust, and customisation options let you add annotations, blur sensitive information, and overlay text or images.
While the video editing features are still in beta, they function well, and the tool integrates smoothly with platforms like Jira, Slack, and GitHub for easy sharing and collaboration.
Pros:
- It’s very user-friendly.
- Multiple capture options.
- Team collaboration feature.
- Integrates well with Google Drive and Dropbox.
Cons:
- Limited editing features.
- Cloud storage issues.
- No collaboration options.
- Some advanced features are behind a paywall, which can be inconvenient if you run out of cloud space.
How to screen record on Awesome Screen
- Add the Awesome Screenshot extension from the Chrome Web Store.
- Click the Awesome Screenshot icon in your browser.
- Select your preferred recording mode like “Desktop,” “Browser Tab,” or “Camera Only.”
- Turn on the microphone and camera options if needed.
- Click “Start Recording” and grant screen-sharing permission.
- Click “Stop Recording” to save or share your video.
#8. Screencastify
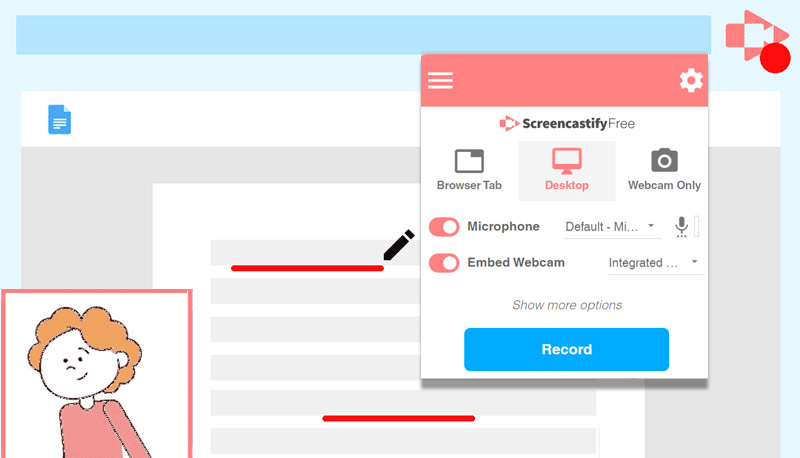
Best for: Educators who need teaching presentations | Time Limit: 5 minutes per video (free version), No watermark | Full Window Capture: Yes | Game Capture: No | Webcam Capture: Yes | Image Capture: Yes | Mix System Sound/Mic: Yes | Scheduled Recording: No (But it enables an auto-stop after recording in 2/5/10/30 minutes.) | Record multiple monitors at once: No | Audio Recording: No (But you can export the recorded video into MP3) | Annotation: Yes | Video (encoder): WebM (AVC/H.264) | Hotkeys: Yes | One-click uploads: Yes | Pricing: $49 per person per year, and $29 per person per year for education discount
Screencastify stands out as a popular screen recording tool, particularly as a Chrome extension.
Its easy-to-use interface allows for capturing your full screen, browser, or webcam.
Screencastify provides options to add text, draw patterns, or highlight elements during recording, making it ideal for educators and professionals looking to engage with video content and track their interactions.
Integration with Google Classroom is a highlight, and while Screencastify’s free version limits recordings to five minutes, it remains a valuable tool for presentations.
Pre-recorded videos are saved directly to Google Drive. This ensures easy access from any location.
Pros:
- Multiple export options.
- Offers a user-friendly UI with simple controls.
- The great blend of features allows users to get more creative space.
Cons:
- The free version is limited to exporting 5-minute-long edited videos.
- Lack of advanced customization.
- Lacks live streaming capabilities
How to record your screen with Screencastify:
- Install Screencastify by adding the extension from the Chrome Web Store.
- Open Screencastify via the icon in your browser's top right corner.
- Set up recording by selecting your preferred recording mode (Browser Tab, Desktop, or Webcam Only).
- Enable audio by toggling the microphone option and the webcam option if needed.
- Start recording by clicking “Record” and granting screen-sharing permission if required.
- Stop recording by clicking the Screencastify icon and selecting “Stop Recording,” then save or share your video.
#9. ShareX
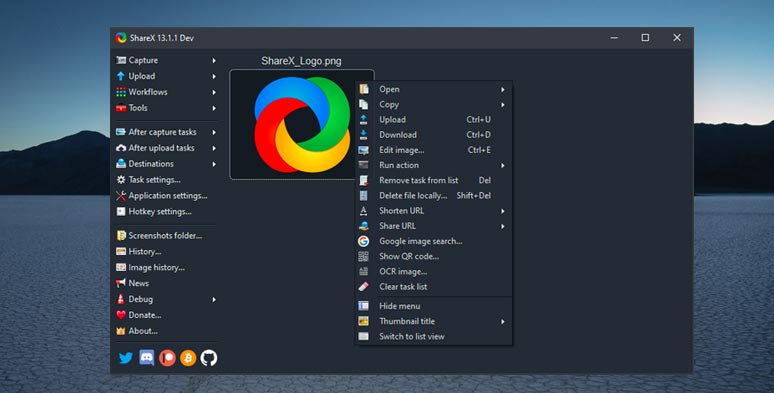
Best for: Advanced screen capture and sharing | Time Limit: None, No watermark | Full Window Capture: Yes | Game Capture: Yes | Webcam Capture: Yes | Image Capture: Yes | Mix System Sound/Mic: Yes | Scheduled Recording: No | Record multiple monitors at once: Yes | Audio Recording: Yes | Annotation: Yes | Video (encoder): MP4, WebM, AVI, MKV, FLV, MOV, TS, M2U8| Hotkeys: Yes | One-click uploads: No
Another robust screen recorder application on Windows 10 is ShareX. It stands out as a no-cost option that delivers impressive functionality without ads.
ShareX’s open-source tool has been refined over 15 years, earning its place as a reliable choice and is used by major companies.
The lightweight design won’t clutter your storage, and its customisable workflow simplifies your recording process.
Beyond basic screen capture, ShareX offers features like an image editor, video converter, multiple format support and OCR, depending on your goals.
Pros:
- The software gets regular updates for improved functionalities.
- Includes annotations, image editing, OCR, and colour picker.
- Allows customisable sharing.
- Free and open source.
- Workflow Automation.
Cons:
- Complex interface.
- No Game capture.
- May turn out to be resource-intensive for the low-end computers.
- Unappealing UI.
How to record your screen with ShareX:
- Download and install ShareX from the official website.
- Launch ShareX.
- Configure recording settings under Task Settings > Screen Recorder.
- Start recording by selecting Capture > Screen Recording and choose the area to record.
- Stop recording using the toolbar; your video saves automatically.
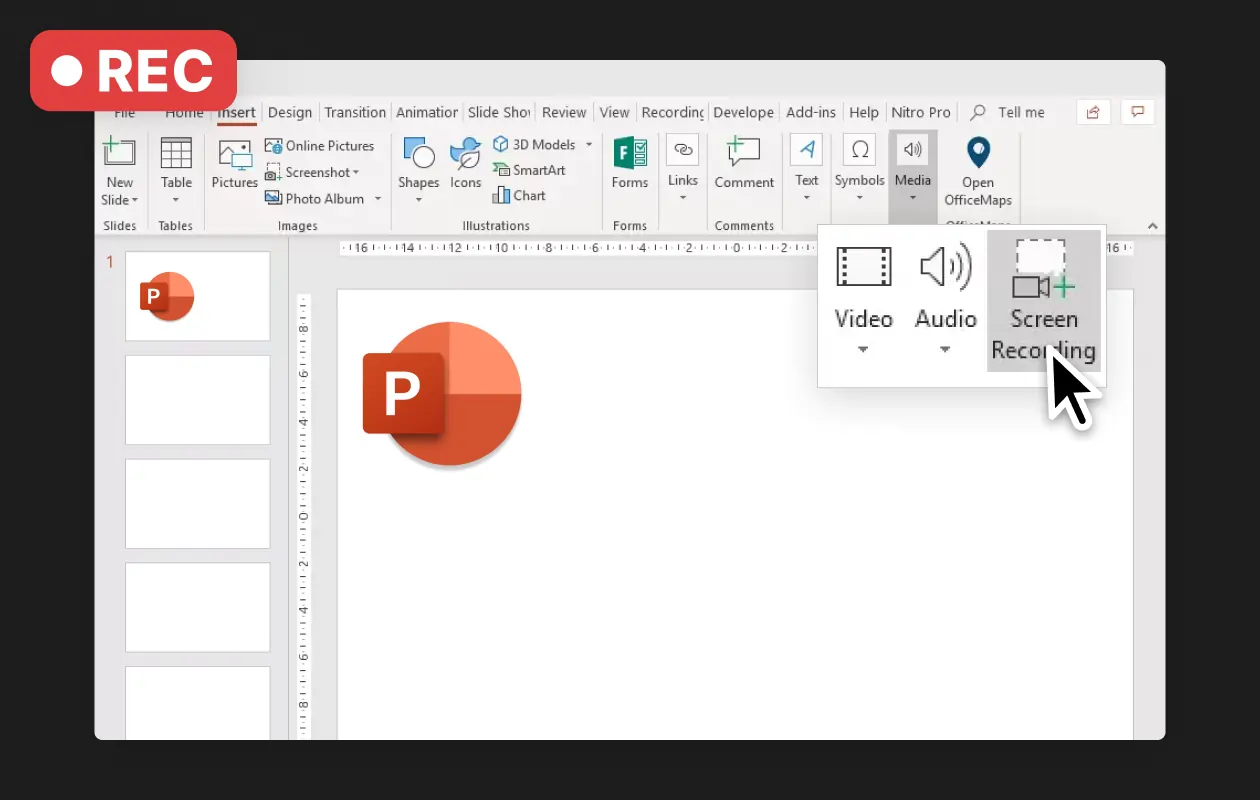
#10. PowerPoint Screen Recorder
Best for: Basic screen recording and embedding | Time Limit: None, No watermark | Full Window Capture: Yes | Game Capture: No | Webcam Capture: Yes | Image Capture: Yes | Mix System Sound/Mic: Yes | Scheduled Recording: No | Record multiple monitors at once: Yes | Audio Recording: Yes | Annotation: No | Video (encoder): MP4 (H.264 video, AAC audio)| Hotkeys: Yes | One-click uploads: No
PowerPoint’s screen recording feature is a handy tool for capturing your screen, especially if you’re already using it for presentations.
Simply go to Insert and select Screen Recording, then save your file as an MP4.
This is a great option if your work computer doesn’t support third-party software or lacks the Snipping tool.
With PowerPoint, you can easily record your screen and integrate the footage into your presentations.
This makes it ideal for adding dynamic content to training sessions, demonstrations, or instructional materials.
Just like Loom, it’s another straightforward solution for developers who need to capture and present screen activity without additional software.
Pros:
- Simple and intuitive interface.
- Integration with PowerPoint presentations.
- No Watermark or time limits.
- Audio Recording.
Cons:
- Limited editing compared to dedicated screen recording software.
- No advanced features.
- May experience performance issues with high-resolution recordings.
How to record your screen with Powerpoint:
- Open PowerPoint and start a new presentation or open an existing one.
- Navigate to the Insert tab and select Screen Recording.
- Choose your recording area by clicking Select Area or use Windows + Shift + F to record the full screen.
- Toggle audio and pointer options as needed.
- Click Record to start capturing your screen after a countdown.
- Stop the recording by clicking Stop on the control dock or pressing Windows + Shift + Q.
- The recording will embed in your slide; right-click to save it as a separate file.
To wrap up
When recording a video on your PC, focus on capturing only the specific window you need to avoid distractions and consider turning off notifications to keep your screen clear. It's important to do a test recording first, running through your content to ensure both the video and audio quality meet your expectations. Always aim to record in HD to make sure viewers can see what you're demonstrating. Keep your video concise to save space and maintain viewer engagement. Finally, even basic editing can enhance the professionalism of your video, making it more polished and effective.
Windows 10 Screen Recorder FAQs
Does Windows 10 have a screen recorder?
Yes, Windows 10 has a built-in screen recorder called Xbox Game Bar, originally for game clips but usable for general screen recording. It offers basic features.
How do I record my screen with audio and video on Windows 10?
Use the Xbox Game Bar by pressing Windows + G or a third-party app like OBS Studio, which also captures system sound or microphone audio.
Why is my Windows 10 screen recorder not working?
Possible reasons: permissions not enabled, low microphone volume, insufficient memory, or outdated drivers. Check these or use other screen recording software.
What is the best free screen recorder for PC?
OBS is highly recommended for its comprehensive features, including recording encrypted videos, gameplay, and custom areas. If you want a less technical option, go for Loom.
How long can you screen record on Windows 10?
Xbox Game Bar limits recordings to 30 minutes. For unlimited recording time, consider using a third-party tool with a premium version.
What are the best screen recorder apps for Android?
Top picks include Google Play Games, AZ Screen Recorder, and ADV Screen Recorder, each offering various features suited for Android devices.
What features should I look for in the best free screen recorder for Windows 10?
Look for features like live streaming, multistreaming, webcam integration, green screen functionality, video overlay, customizable hotkeys, real-time preview, picture-in-picture or split-screen effects, a user-friendly interface, and basic video editing tools. Loom is a great choice that covers many of these aspects.
Is OBS Screen Recorder safe?
Yes, OBS Studio is safe. Being open-source, it benefits from community oversight and frequent updates. Ensure you download it from the official website and keep it updated for the best security.
Why won't my Mac allow screen recording?
If your Mac isn’t allowing screen recording, check your system settings. Go to Apple Menu > System Preferences > Security & Privacy > Privacy > Screen Recording, and make sure the app you’re using is ticked for permission.
Can any website detect screen recordings?
Yes. Screen recording or Screenshots can be tracked by certain apps to protect copyrighted content and prevent piracy.